Hello! Welcome to Embedic!
1 x Arduino on breadboard
1 x Arduino UNO
Connection line
Arduino IDE installed on the PC
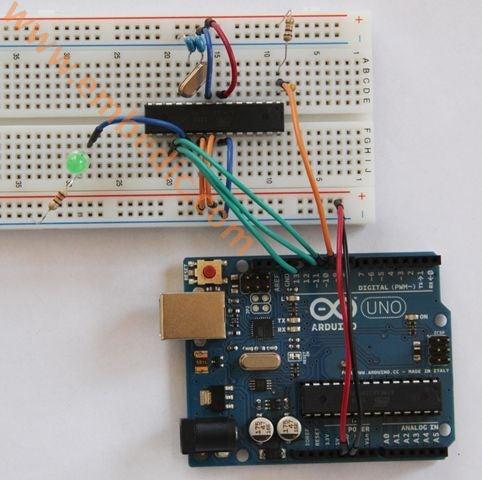
We will use Arduino UNO to guide ATMEGA328 to sit on the Arduino on the breadboard. If you have ATMEGA328P-PU, this is very simple, but for ATmega328-PU, additional steps are required.
We need to resolve these differences in Instructable. Program the Arduino UNO to act as an ISP (In-System Programmer) to burn the bootloader onto the breadboard chip.
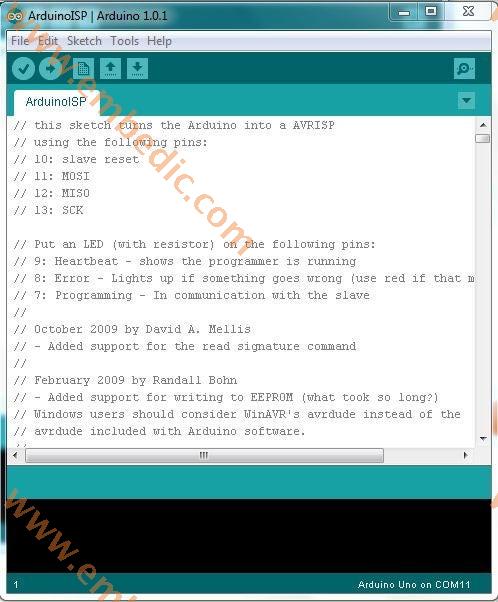
Open Arduino IDE
Open the ArduinoISP sketch (under "File", "Example")
If you are using version 1.0 of the IDE:
Search for "Invalid Heartbeat" and change the following line:
delay(40);
To
delay(20);
Connect your UNO to the PC, making sure it is not connected to the Arduino on the breadboard.
Make sure UNO is selected under the Boards menu option, then upload
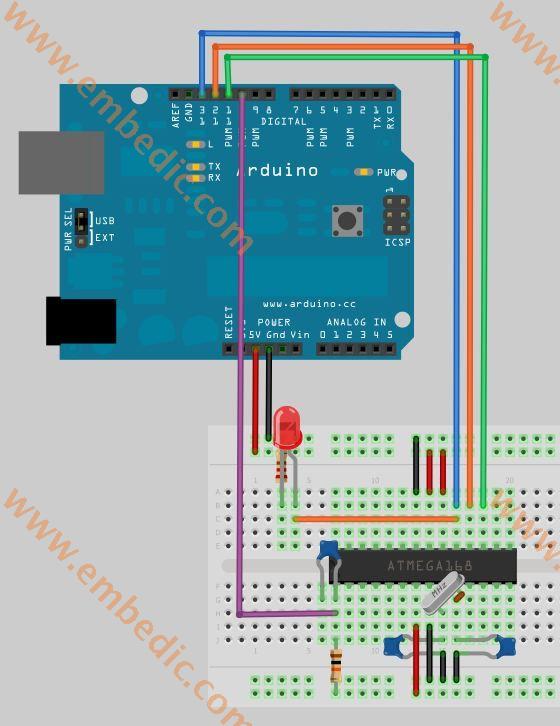
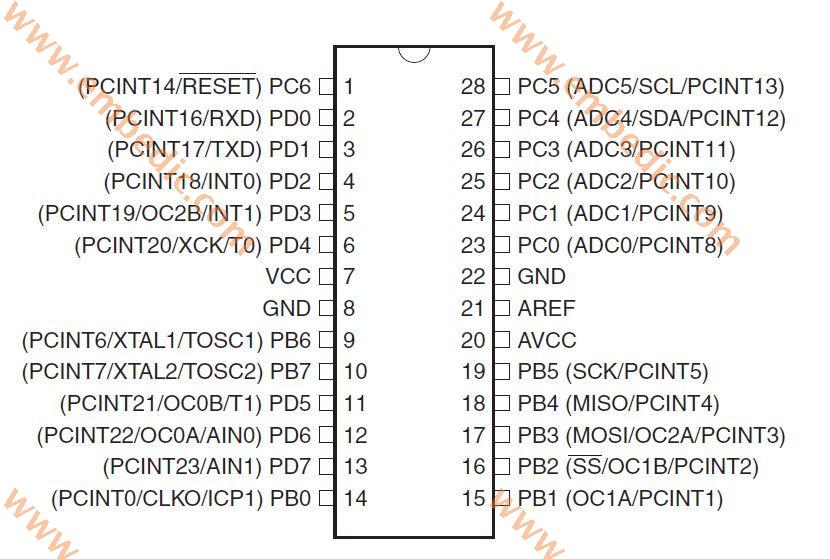
Now, connect ATmega to UNO as follows:
UNO 5v ---》 ATmega pin 7 (VCC)
UNO GND ---》 ATmega pin 8 (GND)
UNO pin 10 ---》 ATmega pin 1 (RESET)
UNO pin 11 ---》 ATmega pin 17 (MOSI)
UNO pin 12 ---》 ATmega pin 18 (MISO)
UNO pin 13 ---》 ATmega pin 19 (SCK)
Please make sure you are not connecting anything else to the ATmega pin used above.

I understand more than one type of ATMEGA328 problem. The two variants we are interested in are ATMEGA328-PU and ATMEGA328P-PU.
The suffix -PU means that the chip is packaged in PDIP, which is the format we need. 328P is a picoPower processor designed for low power consumption and used on Arduino boards. Considering low power consumption, this is the first choice.
The 328 does not have picoPower technology and is not used on the Arduino board-and is not explicitly supported. Arduino IDE. This means that we can easily boot ATMEGA328P instead of ATMEGA328. Unfortunately, the websites that sell these chips are not always able to distinguish between them, and the forums are full of people trying to use ATMEGA328-PU.
Fortunately, there is a solution.
Each microprocessor has a signature-a unique code to identify its model. When you start the chip loading (or even upload the sketch), the Arduino IDE will check whether the selected chip matches the type it is connected to. Even though ATMEGA328-PU has essentially the same functions as ATMEGA328P-PU, it has a different signature and is not recognized by Arduino IDE.
(Behind the scenes: the Arduino IDE actually uses AVRDUDE to program the chip, so you will see an error message from avrdude.
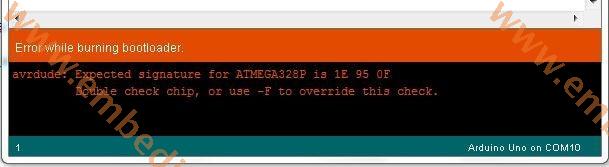
If you try to bootload the ATMEGA328-PU, you will receive a message similar to the following:
avrdude: device signature = 0x1e9514
avrdude: The expected signature of ATMEGA328P is 1E 95 0F
Double check the chip, or use -F to overwrite this check.
Get a more colorful version:
avrdude: Oh! Invalid device signature.
The solution to this problem is to "cheat" the IDE and make you think that your 328-PU is actually a 328P-PU. Disclaimer: I have tested this and it works-there is no guarantee that it will not cause unforeseen consequences.
Solution:
In the Arduino folder, find the subfolder:. . \ hardware \ tools \ avr \ etc
Make a backup copy of the file: avrdude.conf
Open the file avrdude.conf in a text editor
Search: "0x1e 0x95 0x0F" (this is the signature of ATMEGA328P)
Replace with: "0x1e 0x95 0x14" (this is the signature of ATMEGA328)
save document
Restart the Arduino IDE
Continue with the remaining steps in the instructions, and when the bootload is complete, the backup copy you made will be restored.
In the Arduino IDE, from the Tools menu:
Under the Board option, select li under the Arduino UNO serial port option.
Make sure the correct port is selected
Under the Programmer option
Choose Arduino as ISP
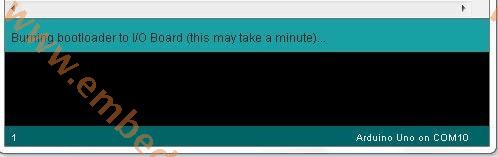
To burn the Bootloader, select Burn Bootloader from the Tools menu
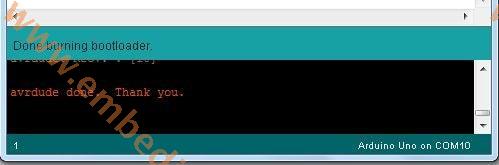
Once the Bootloader is burned, you will see a message confirming success.
Congratulations: you can now load the sketch onto the Arduino on the breadboard!
Upload sketch
ATMEGA328P-PU: You can leave the settings unchanged and use Arduino UNO to upload the sketch to the newly booted ATmega
ATMEGA328-PU: The IDE will notice that the signature is invalid – therefore, you will have to change the avrdude.conf file again or upload using the FTDI board. In any case, I prefer to use the FTDI board because it will not stop UNO from circulating and can be connected quickly.
The above is the whole content of "How to use ArduinoUNO to boot ATMEGA328" brought by embedic. If you like this article, you might as well continue to pay attention to our website, embedic will bring more exciting content later.
Manufacturer: Texas Instruments
IC DSP FIXED POINT 196NFBGA
Product Categories: DSP
Lifecycle:
RoHS:
Manufacturer: Texas Instruments
IC DSP FIXED POINT 737FCBGA
Product Categories: DSP
Lifecycle:
RoHS:
Manufacturer: Texas Instruments
IC DSP FIXED/FLOAT POINT 256BGA
Product Categories: DSP
Lifecycle:
RoHS:
Manufacturer: Texas Instruments
IC DSP FIXED POINT 196NFBGA
Product Categories: DSP
Lifecycle:
RoHS:
Looking forward to your comment
Comment
1
2
3
4
5
6
 Popular Searches
8 Bit MCU, Flash, PIC16 Family PIC16F7XX Series Microcontrollers, 20 MHz, 7 KB, 192 Byte, 44 Pi...
EEPROM 2K 256 X 8 2.5V SERIAL EE IND
System-On-Modules - SOM RCM2200
32-bit Arm Cortex-A53 vision processor with ISP, powerful 3D GPU, dual APEX-2 vision accelerat...
IC MCU 8BIT 60KB FLASH 44QFP
DSP 20MHZ 44QFP
Product updates, events, and resources in your inbox


Smart System

Traffic Management

Security

Consumer Electronics

Wireless Technology

Robot

Internet of Things

Industrial Control